Bone Plates
Bone Screws
© Vast Ortho: Orthopedic Implants Manufacturers
First Floor, Khasra No. 104/14 | B-Block, Sant Nagar, Burari | Delhi-110084, INDIA
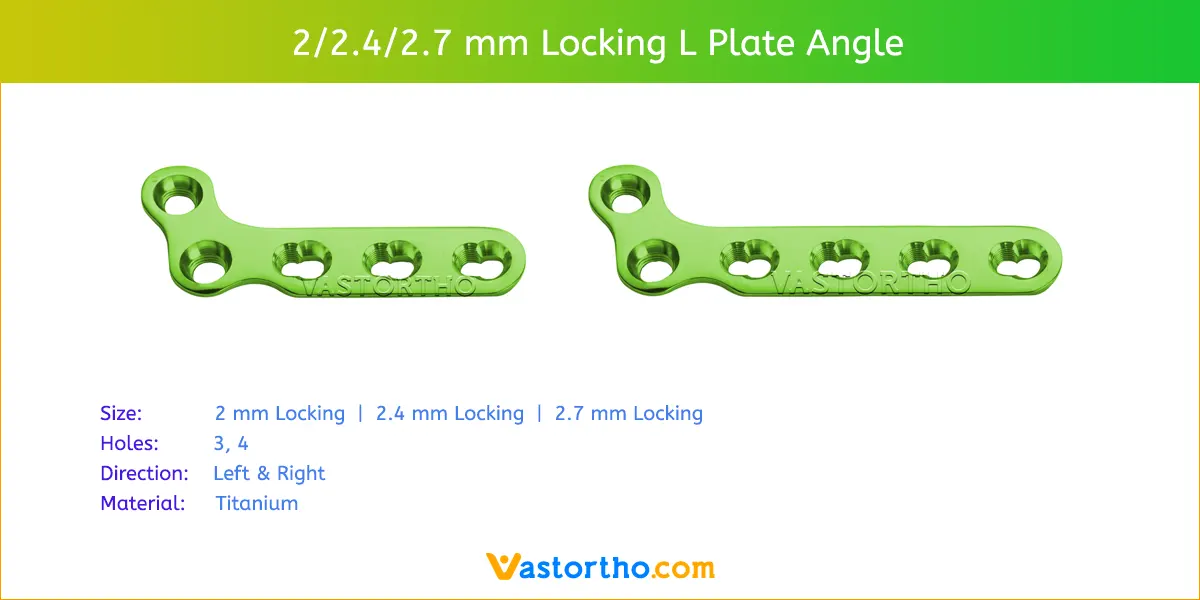
Hand and Foot Plates are used to treat fractures of the hand and foot bones. It is a small metal plate that is surgically implanted onto the affected bone to stabilize it and promote healing. These plates are commonly used in cases where a fracture is severe, displaced, or unstable and cannot be treated with a cast or splint alone.
The plate is typically made of titanium and is designed to be low profile and contoured to fit the shape of the bone. It is secured to the bone using screws, which are also made of titanium and come in various sizes and lengths to accommodate different bone sizes and types of fractures.
Hand and Foot Plates are usually placed on the underside of the bone to minimize interference with the tendons and ligaments that run over the top of the hand. The plate is typically left in place for several months to allow the bone to heal, after which it may be removed surgically.
These plates has been shown to significantly improve the outcome of hand and foot fracture treatment, reducing the time needed for healing and decreasing the risk of complications such as malunion (improper healing of the bone) or non-union (failure to heal). However, like any surgical procedure, there are risks associated with the use of hand fracture plates, including infection, nerve damage, and implant failure. Your doctor will evaluate your specific case to determine if this is the best treatment option for you.
Hand and Foot fractures are a common injury that can affect people of all ages. In some cases, surgery may be necessary to repair the fracture and promote proper healing. The type of Hand and Foot Plate used will depend on a number of factors, including the location and severity of the fracture, as well as the patient’s age and overall health. In some cases, a plate may be used temporarily and removed once the bone has healed, while in other cases the plate may be left in place permanently.
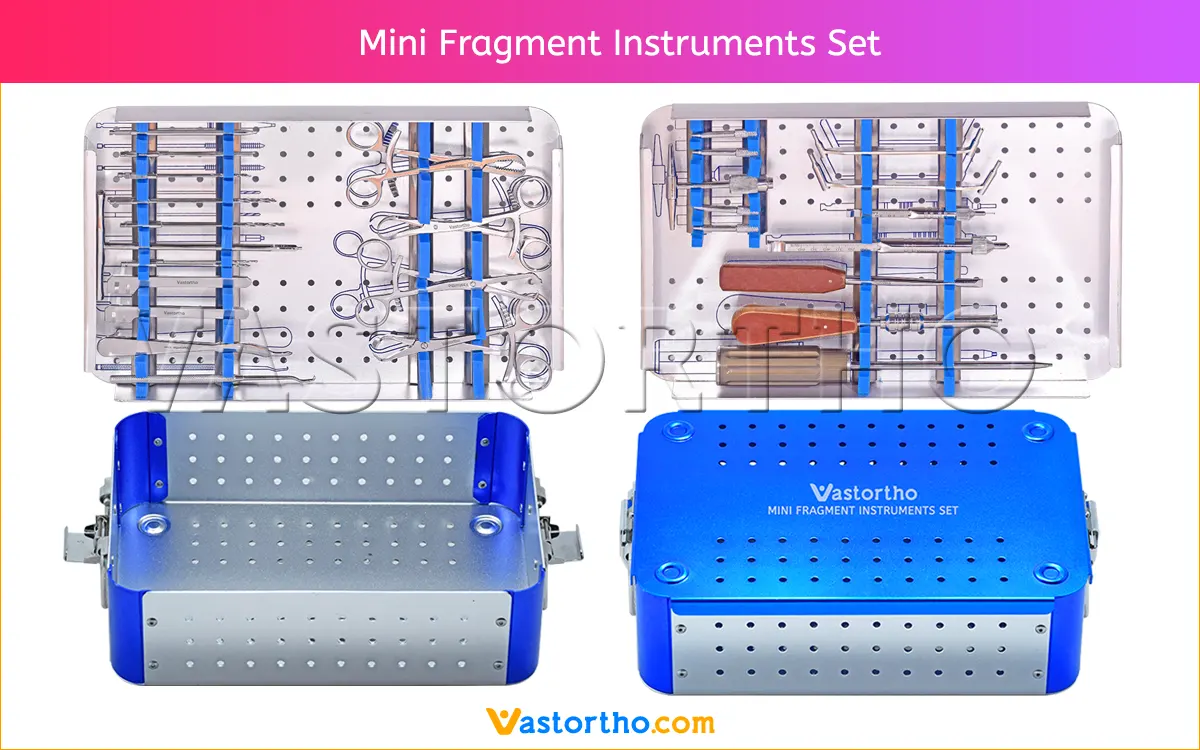
A complete instruments set are also available for Hand and Foot Plates. Instruments can be modified according to the customer’s requirement with minimum quantity required. All these instruments can be used several times.
We are keeping wide range of instruments items in this set to ensures that Doctors get almost all required items during surgery. Below is list of items of this set.
The heads of the locking screws contain male threads while the holes in the plates contain female threads. This allows the screw head to be threaded into the Hand and Foot Plates hole, locking the screw into the plate. This technical innovation provides the ability to create a fixedangle construct while using familiar plating techniques.
By using locking screws in a bone plate, a fixed-angle construct is created. In osteopenic bone or fractures with multiple fragments, secure bone purchase with conventional screws may be compromised. Locking screws do not rely on bone/plate compression to resist patient load, but function similarly to multiple small angled blade plates. In osteopenic bone or comminuted fractures, the ability to lock screws into a fixed-angle construct is imperative.
By combining locking screw holes with compression screw slots in the shaft, the plate can be used as both a locking device and a fracture compression device. If compression is desired, it must be achieved first by inserting the standard screws in the compression screw slots before inserting any locking screws.
2 mm Locking Cortical Screws available lengths are 8mm, 10mm, 12mm, 14mm, 16mm, 18mm, 20mm, 22mm, 24mm, 26mm, 28mm and 30mm.
2.7 mm Cortical Screws available lengths are 8mm, 10mm, 12mm, 14mm, 16mm, 18mm, 20mm, 22mm, 24mm, 26mm, 28mm and 30mm.
2.7 mm Locking Cortical Screws available lengths are 8mm, 10mm, 12mm, 14mm, 16mm, 18mm, 20mm, 22mm, 24mm, 26mm, 28mm and 30mm.
2.7 mm Cortical Screws available lengths are 8mm, 10mm, 12mm, 14mm, 16mm, 18mm, 20mm, 22mm, 24mm, 26mm, 28mm and 30mm.
2.7 mm Locking Cortical Screws available lengths are 8mm, 10mm, 12mm, 14mm, 16mm, 18mm, 20mm, 22mm, 24mm, 26mm, 28mm, 30mm, 32mm, 34mm, 36mm, 38mm and 40mm.
2.7 mm Cortical Screws available lengths are 8mm, 10mm, 12mm, 14mm, 16mm, 18mm, 20mm, 22mm, 24mm, 26mm, 28mm, 30mm, 32mm, 34mm, 36mm, 38mm and 40mm.
These Screws are made from pure Titanium and SS 316L. Any additional length sizes of these screws will be made on demand.
Select the plates according to the fracture pattern and anatomy of the bone.
Reduce the fracture under image intensification and, if necessary, fix with Kirschner wires or reduction forceps. The reduction method is fracture-specific.
Trim the plate to the desired length using bending/cutting pliers. Remove the burrs.
If necessary, contour the plate to suit the anatomical conditions. Use bending pins for LCP Plates and thread the pins into the screw holes to contour the plate. The plate can also be bent using two flat nosed pliers.
If possible, bend the plate between the locking/LCP holes. Do not deform the threaded part of the holes or overbend the plate as this may adversely affect insertion of locking screws. Avoid repetitive bending of the plate. Reverse bending or use of the incorrect instrumentation for bending may weaken the plate and lead to premature plate failure (e.g. breakage). Do not bend the plate beyond what is required to match the anatomy.
Position the plate over the reduced fracture and, if necessary fix provisionally with Kirschner wires or reduction forceps. When using the holding forceps with swivel foot to hold the plate, remove the drill sleeves from the surrounding holes so that the holding forceps sit flush on the plate.
Depending on the individual case, cortex and/or locking screws may be inserted. Determine where locking screws and where cortex screws will be used.
The final screw placement and the use of locking and cortex screws are determined by the fracture pattern. If a locking screw is inserted first, ensure that the Hand and Foot Plates are held securely to the bone to prevent the plate from spinning as the screw locks into the plate.
Drill the screw hole using the drill bit and the corresponding drill guide / drill sleeve. Determine the screw length with the corresponding depth
gauge. Insert the self-tapping cortex screw using the corresponding screwdriver.
Drill screw hole through the LCP drill sleeve using the appropriately sized drill bit. Determine the screw length either with the corresponding depth gauge or with the LCP drill sleeve. When using the LCP drill sleeve check the length directly on the scale of the drill sleeve. Then remove the drill sleeve. Insert the self-tapping locking screw using the corresponding screwdriver shaft and the appropriate handle.
To remove the plate, first unlock all screws then definitely remove them in a second step. If the screws are not unlocked before removal the plate may rotate while the last screw is being removed and cause soft tissue damage.
Contraindications may be qualified or total, and need to be taken into consideration when evaluating the prognosis in each case. The physician’s education, training and professional judgement must be relied upon to choose the most appropriate device and treatment. Conditions presenting an increased risk of failure include:
Before using Hand and Foot Plates, the surgeon and ancillary staff should study the safety information in these instructions, as well as any product-specific information in the product description, surgical procedures and/or brochures.
Plates are made from medical grade materials and are designed, constructed and produced with utmost care. These quality assure best working results provided they are used in the proper manner. Therefore, the following instructions for use and safety recommendations must be observed.
Improper use of Plates can lead to damage to the tissue, premature wear, destruction of the instruments and injury to the operator, patients or other persons.
It is vital for the operating surgeon to take an active role in the medical management of their patients. The surgeon should thoroughly understand all aspects of the surgical procedure and instruments including their limitations. Care in appropriate selection and proper use of surgical instruments is the responsibility of the surgeon and the surgical team. Adequate surgical training should be completed before use of this plate.
The following adverse effects are the most common resulting from implantation:
The operating planning is carried out following a thorough clinical evaluation of the patient, Also, x-rays must be taken to allow a clear indication of the bony anatomy and associated deformities. At the time of the operation, the corresponding implantation instruments in addition to a complete set of Hand and Foot Plates must be available.
The clinician should discuss with the patient the possible risks and complications associated with the use of Implants. It is important to determine pre-operatively whether the patient is allergic to any of the implant materials. Also, the patient needs to be informed that the performance of the device cannot be guaranteed as complications can affect the life expectancy of the device.
As with all major surgical procedures, risks, side effects and adverse events can occur. While many possible reactions may occur, some of the most common include: Problems resulting from anesthesia and patient positioning (e.g. nausea, vomiting, dental injuries, neurological impairments, etc.), thrombosis, embolism, infection, nerve and/or tooth root damage or injury of other critical structures including blood vessels, excessive bleeding, damage to soft tissues incl. swelling, abnormal scar formation, functional impairment of the musculoskeletal system, pain, discomfort or abnormal sensation due to the presence of the device, allergy or hypersensitivity reactions, side effects associated with hardware prominence, loosening, bending, or breakage of the device, mal-union, non-union or delayed union which may lead to breakage of the implant, reoperation.